When you purchase through links on our site, we may earn an affiliate commission. How it works.
- Safe for most skin types when done with proper technique.
- Removes peach fuzz and dead skin cells for immediate smoothness and glow.
- Enhances product absorption and makeup application.
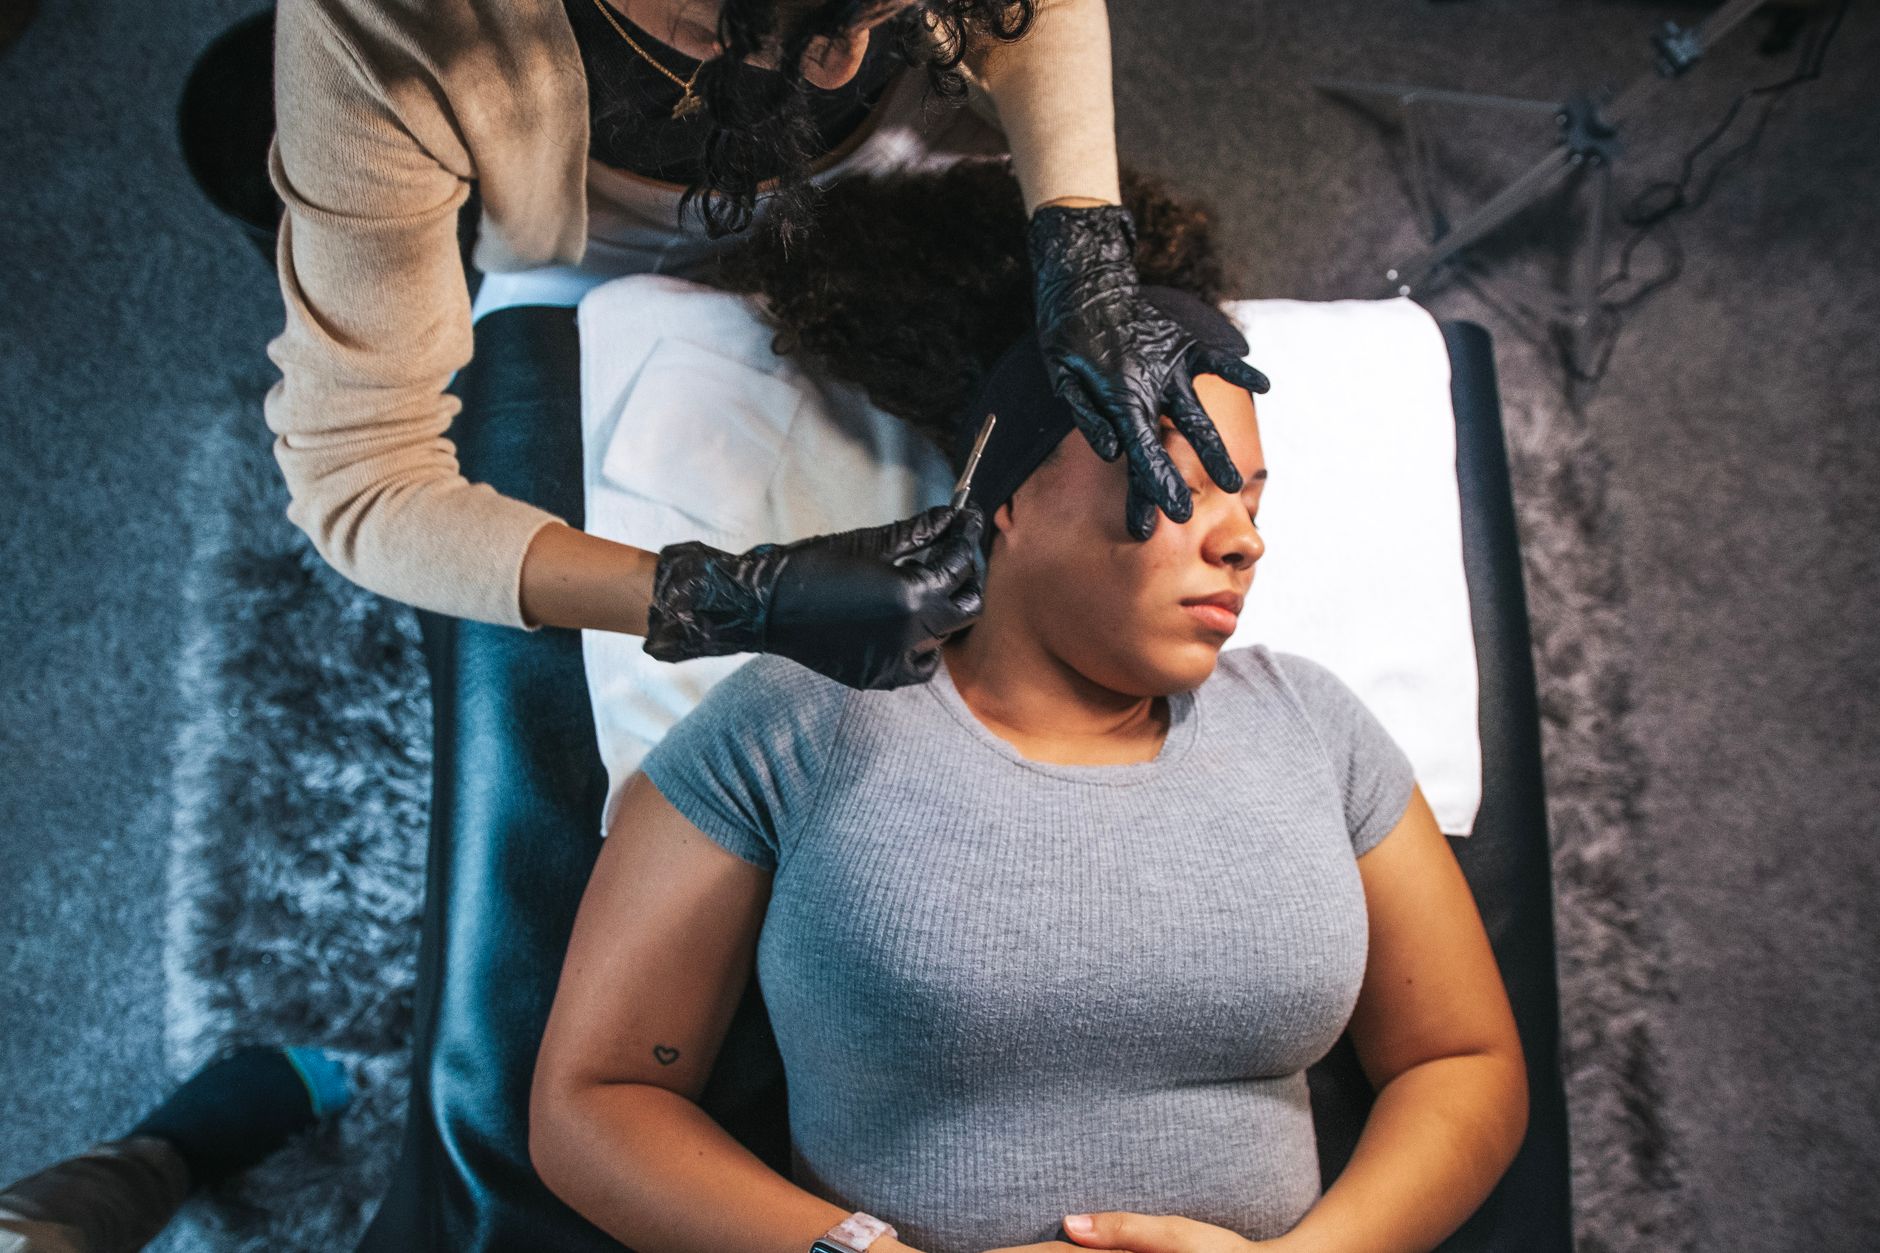
Is at-home dermaplaning safe for your face? This is a question I get asked constantly, and it’s crucial to ask before you grab a blade. After spending weeks incorporating dermaplaning at home into my own routine and digging into the science, I can confidently say that with the right knowledge and tools, those coveted smooth, glowing results are absolutely within reach for most women. Forget expensive salon appointments; we’re here to guide you through the process, explaining the ‘why’ behind each step so you can feel empowered and informed. I believe in understanding your skincare, not just following trends.
Many of us are hunting for that effortless glow, that silky-smooth canvas that makes makeup glide on and skincare sink in beautifully. For years, dermaplaning was a treatment reserved for pros, but the beauty market’s evolved, bringing effective tools right to our fingertips. The idea of gently scraping away the fine vellus hair (often called peach fuzz) and the topmost layer of dead skin cells might sound a little intimidating at first. However, when done correctly, dermaplaning at home can offer remarkable benefits, revealing brighter, more radiant skin beneath. It’s a form of physical exfoliation that, at its core, helps to refresh your complexion.
The science is simple: our skin is constantly renewing itself. As new cells generate in deeper layers, older, dead cells accumulate on the surface. Over time, this build-up can lead to a dull complexion, uneven texture, and can even impede the efficacy of your serums and moisturizers. Dermaplaning manually sloughs off this layer, along with that fine facial hair that can catch light and contribute to a less-than-luminous appearance. The key to success, and indeed safety, lies in understanding the tools, the technique, and how your skin responds.
What to Look For in At-Home Dermaplaning Tools and How the Science Works
When we talk about dermaplaning at home, the first thing to consider is the tool itself. This isn’t about grabbing any old razor; it’s about selecting a device specifically designed for the delicate skin on your face. The primary component is the blade, which is typically a very fine, sharp, surgical-grade stainless steel. These blades are designed to be used at a specific angle to effectively remove dead skin cells and fine hairs without causing nicks or irritation. The angle is crucial – I’m aiming for a gentle scraping motion, not a deep cut. Most at-home tools are designed to be held at a 45-degree angle to the skin.
The science behind the efficacy lies in the combination of physical exfoliation and hair removal. The sharp edge of the blade microscopically shaves off the stratum corneum, the outermost layer of the epidermis. This layer is primarily composed of dead skin cells, which, when left to accumulate, can make your skin appear dull and rough. By removing this layer, you’re essentially revealing the fresher, younger skin cells underneath, leading to an immediate improvement in radiance and smoothness. I’ve noticed this effect myself after using my favorite tool.
Furthermore, the removal of vellus hair, or peach fuzz, plays a significant role in achieving that coveted glow. While these hairs are typically fine and translucent, they can trap oil and debris and diffract light in a way that diminishes overall brightness. When they’re removed, your skin appears smoother and reflects light more uniformly, contributing to a more luminous complexion. This is also why skincare products and makeup can adhere better and appear more flawless after dermaplaning; there’s a cleaner surface for them to interact with.
When choosing an at-home tool, consider the handle’s grip for stability and the blade’s design. Many tools feature a protective guard or a specific blade shape to enhance safety. Some advanced devices, like the Dermaflash Luxe, incorporate sonic vibrations to further aid in exfoliation and product penetration, adding another layer of technological sophistication. Understanding the blade’s sharpness and material is key. High-quality stainless steel ensures a clean cut and reduces the risk of snagging or pulling, which can lead to irritation. My only gripe is that replacement blades can add up over time.
Is At-Home Dermaplaning Safe for My Skin Type?
Related reading: Skincare Routine for Acne-Prone Skin: AM and PM Step by Step
This is a frequently asked question and one that deserves a thorough answer. The short answer is: for most skin types, dermaplaning at home can be safe and beneficial, provided you exercise caution and follow proper guidelines. However, there are nuances depending on your specific skin concerns.
For normal to combination skin: These skin types generally tolerate dermaplaning well. The exfoliation can help balance oil production and improve overall texture, leading to a smoother, more even complexion. I’ve seen this on clients with this skin type.
For dry skin: Dermaplaning can be a fantastic way to slough off dry, flaky patches, making your skin feel instantly softer and more hydrated (especially after applying moisturizer!). However, it’s crucial to be extra gentle and ensure your skin is well-hydrated before and after the treatment. Avoid dermaplaning if your skin is actively peeling or severely compromised.
For oily and acne-prone skin: This is where caution is advised. While dermaplaning can remove the dead skin cells that can clog pores, there’s a risk of spreading active acne lesions or irritating existing breakouts. If you have active, inflammatory acne, it’s generally best to avoid dermaplaning until your skin has cleared. For those with mild congestion or post-acne marks, it can be beneficial, but always work around active pimples and be very gentle. Some dermatologists suggest waiting a few days after a breakout has healed before dermaplaning to avoid irritating the newly formed skin.
For sensitive skin: If your skin is prone to redness, irritation, or sensitivity, proceed with extreme caution. Always perform a patch test on a small, inconspicuous area of your face (like your jawline) first. Use a very light touch, and consider dermaplaning less frequently, perhaps once a month. Listen to your skin; if you experience significant redness or discomfort, it might not be the right treatment for you.
For mature skin: Dermaplaning can be excellent for mature skin, as it helps to reveal brighter skin and can improve the appearance of fine lines and texture. However, mature skin can sometimes be thinner and more delicate, so a gentle approach and thorough hydration are paramount. I’ve found this to be true with my own mature-leaning skin.
The key takeaway for all skin types is to listen to your skin. If it feels irritated, red, or sensitive, stop. Never dermaplane over active breakouts, open wounds, or sunburnt skin. Always ensure your skin is clean and dry before starting, and follow up with soothing, hydrating skincare.
How to Dermaplane Face Safely: A Step-by-Step Guide
Safety is non-negotiable when it comes to dermaplaning at home. Following a careful, step-by-step process will significantly reduce the risk of nicks, irritation, or other adverse reactions. I’ve broken down the essential steps to help you achieve smooth, glowing skin with confidence.
Step 1: Cleanse Your Skin Thoroughly Begin by cleansing your face with a gentle, pH-balanced cleanser. This removes any makeup, oil, dirt, and product residue. You want a completely clean canvas to ensure the blade glides smoothly and to prevent any impurities from being pushed into the skin. Avoid harsh cleansers that can strip your skin, as this could increase sensitivity. Pat your face dry gently with a clean towel.
Step 2: Ensure Skin is Completely Dry This is a critical safety step. Dermaplaning should always be performed on dry skin. Wet or damp skin can cause the blade to slip, increasing the risk of cuts and nicks. Make sure your skin is thoroughly dry before you proceed.
Step 3: Hold the Skin Taut Using your free hand, gently pull the area of skin you’re about to dermaplane taut. This creates a flat surface and allows the blade to glide smoothly over the skin without catching. For example, when working on your cheek, pull the skin upwards and outwards slightly.
Step 4: Angle the Tool Correctly Hold your dermaplaning tool at approximately a 45-degree angle to your skin. The blade should be held almost parallel to your skin’s surface, but with a slight tilt. You’re aiming to gently skim the surface, not to dig in.
Step 5: Use Short, Feather-Light Strokes Begin in an area with less sensitivity, such as the cheek or jawline. Use short, upward or downward strokes (depending on the tool and your preference, but consistency is key for beginners) with very light pressure. Move the tool in one direction only – don’t go back and forth over the same area repeatedly, as this can cause irritation.
Step 6: Work in Sections Dermaplane one small section of your face at a time. After each stroke, inspect the blade to ensure it’s free of hair and skin cells. Wipe the blade clean with a soft cloth or tissue between strokes if necessary. Continue working across your face, section by section, always holding the skin taut and maintaining the correct angle. Avoid areas with active breakouts, moles, or broken skin. Be extremely cautious around the lip and brow areas.
Step 7: Rinse and Pat Dry Once you have finished dermaplaning your entire face, rinse your skin with cool water to remove any lingering debris. Gently pat your skin dry with a clean, soft towel. Avoid rubbing.
Step 8: Apply Soothing Skincare Immediately after dermaplaning, your skin will be more receptive to skincare products. Apply a gentle, hydrating serum (like hyaluronic acid) and a soothing moisturizer. Avoid any products containing harsh actives like strong retinoids, AHAs/BHAs, or fragrance for at least 24-48 hours, as your skin barrier will be temporarily compromised. Sunscreen is non-negotiable the next day and every day.
Step 9: Clean Your Tool After each use, thoroughly clean your dermaplaning tool according to the manufacturer’s instructions. This typically involves rinsing the blade under warm water and disinfecting it with rubbing alcohol. Store it in a clean, dry place.
Why is Dermaplaning at Home Beneficial?
Related reading: Salicylic Acid Guide: How to Use It for Acne Without Over-Drying
The appeal of dermaplaning at home goes beyond just achieving a smooth complexion. When done correctly, it offers a multifaceted approach to improving your skin’s health and appearance. One of the primary benefits is the immediate unveiling of brighter, more radiant skin. By removing the dulling layer of dead skin cells, you allow light to reflect more effectively, giving your complexion a luminous, healthy glow. This is particularly beneficial for those who feel their skin looks tired or lackluster. Honestly, the glow is immediate.
Another significant advantage is the enhanced efficacy of your skincare routine. With the top layer of dead skin and fine hairs removed, your serums, moisturizers, and treatments can penetrate deeper into the skin. This means you’re getting more out of your investment in high-quality skincare products, as they can reach the living cells where they can have a greater impact. Think of it as preparing a clean canvas for your favorite active ingredients to work their magic. I’ve noticed my serums seem to absorb faster afterward.
Furthermore, dermaplaning can help to improve the texture of your skin. The physical exfoliation smooths out rough patches, making your skin feel incredibly soft to the touch. This can also lead to a more even makeup application, as foundation and concealer will glide on effortlessly without catching on dry or uneven areas. For many, it also provides a sense of personal pampering and control over their skincare routine, allowing for professional-level results in the comfort of their own home.
What Are the Potential Risks of Dermaplaning at Home?
While I’m a big fan of the benefits of dermaplaning at home, it’s crucial to be aware of the potential risks involved. The primary concern is skin irritation. If you apply too much pressure, use a dull blade, or dermaplane too frequently, you can cause redness, inflammation, and discomfort. This is especially true for individuals with sensitive skin.
Another risk is nicking or cutting your skin. This can happen if you’re not careful, if the skin isn’t held taut, or if the tool slips. While usually minor and superficial, these cuts can be painful and may lead to temporary scarring or hyperpigmentation, particularly for those prone to post-inflammatory hyperpigmentation.
There’s also the misconception that dermaplaning causes hair to grow back thicker or darker. This is a myth. Dermaplaning shaves the vellus hair at the surface, and while it might feel slightly different as it grows back because the end is blunt, it doesn’t alter the hair follicle or the hair’s growth cycle, thickness, or color. However, if you have concerns about facial hair, it’s always best to consult with a dermatologist.
Finally, if you have active acne or other skin conditions like eczema or rosacea, dermaplaning can exacerbate these issues. Spreading bacteria from active lesions can lead to more breakouts, and the exfoliation itself can trigger inflammation in already compromised skin. Therefore, it’s essential to assess your skin’s current condition before attempting at-home dermaplaning.
Which Dermaplaning Tools Are Best for Beginners?
When you’re just starting out with dermaplaning at home, choosing the right tool can make all the difference in ensuring a safe and effective experience. I’ve looked at several options, and for beginners, the focus should be on ease of use, safety features, and gentle exfoliation.
The SEPHORA COLLECTION Facial Hair Removal Tool is a great entry-level option. It’s designed to be user-friendly with a comfortable grip and a blade that’s not overly aggressive. It’s excellent for removing peach fuzz and gently exfoliating, making it ideal for those new to the process. Its straightforward design means less intimidation and a quicker learning curve.
For those looking for a slightly more advanced but still beginner-friendly option, the Finishing Touch Flawless Dermaplane Glow offers a built-in LED light, which is incredibly helpful for illuminating the skin and ensuring you don’t miss any spots. It also has a gentle rotating blade designed for safe exfoliation. The added glow feature can also provide a mild sonic massage.
The Juno Skin Dermaplaning Tool is another contender that balances effectiveness with a user-friendly design. It’s known for its sharp yet manageable blade, making it suitable for beginners who want noticeable results without the steep learning curve. Its ergonomic handle ensures a good grip, which is vital for control.
While the Dermaflash Luxe Anti-Aging Dermaplaning Exfoliation Device is a premium choice and incredibly effective, it might be a more significant investment for a complete beginner. However, if you’re willing to invest and are committed to learning the technique, its advanced features and sonic technology can provide exceptional results.
The Stackable Stainless Steel Dermaplaning Tool offers a more traditional approach. While effective, it might require a bit more practice to get the angle and pressure just right compared to some of the more modern, ergonomically designed tools. For a beginner, prioritizing a tool with a comfortable grip and a slightly more forgiving blade can lead to a more positive initial experience.
Ultimately, the “best” tool for beginners is one that feels comfortable in your hand, has clear safety features, and allows you to practice the correct technique with confidence. Always start with lighter pressure and shorter strokes until you get a feel for the tool and how your skin responds.
SEPHORA COLLECTION Facial Hair Removal Tool
The SEPHORA COLLECTION Facial Hair Removal Tool is a fantastic entry point for anyone curious about dermaplaning at home. I love its simplicity and effectiveness. It’s designed with a comfortable grip that makes it easy to maneuver, even for those who might feel a bit apprehensive about using a blade on their face. The tool gently exfoliates the skin while removing fine vellus hair, leaving your complexion feeling noticeably smoother and looking brighter. It’s made with a fine-tipped blade that aims to skim the skin rather than cut it, which is crucial for minimizing the risk of nicks and irritation.
I found that after using this tool, my skin felt incredibly soft and looked more radiant. It’s a great way to prepare the skin for better absorption of serums and moisturizers, making your entire skincare routine more impactful. The exfoliation it provides helps to slough away dead skin cells that can contribute to a dull appearance, revealing the fresh, glowing skin underneath. It’s also an affordable option, making it accessible for those who want to try dermaplaning without a significant financial commitment. For beginners, this tool offers a gentle introduction to the benefits of at-home dermaplaning.
Verdict: A user-friendly and effective tool for beginners looking to try dermaplaning at home for the first time. SEPHORA COLLECTION Facial Hair Removal Tool
Dermaflash Luxe Anti-Aging Dermaplaning Exfoliation Device
The Dermaflash Luxe Anti-Aging Dermaplaning Exfoliation Device is a premium option that truly elevates the at-home dermaplaning experience. If you’re looking for a sophisticated tool that combines advanced technology with effective exfoliation, this is it. The Luxe device utilizes sonic vibrations alongside its specialized blade to not only remove peach fuzz and dead skin cells but also to enhance product absorption and promote a more youthful-looking complexion. The sonic pulses help to loosen debris and dead skin, making the exfoliation process even more thorough.
I was impressed by how smoothly the Dermaflash Luxe glided across the skin. The device is designed to be held at the perfect angle, and the sonic technology seems to do a lot of the work for you, requiring a very light touch. Post-treatment, my skin felt incredibly smooth, firm, and visibly brighter. It’s particularly beneficial for mature skin, as the sonic exfoliation can help to stimulate collagen production over time and improve the appearance of fine lines and texture. The accompanying soothing edge is a thoughtful addition, designed to calm the skin after treatment. While it’s an investment, the results are undeniably impressive, offering a spa-quality treatment in the comfort of your home.
Verdict: A high-tech, effective device for those seeking an anti-aging boost and a luxurious at-home dermaplaning experience. Dermaflash Luxe Anti-Aging Dermaplaning Exfoliation Device
Finishing Touch Flawless Dermaplane Glow
The Finishing Touch Flawless Dermaplane Glow aims to bring a radiant glow to your skin through at-home dermaplaning, and it largely succeeds. This device is designed with user-friendliness in mind, featuring an ergonomic handle for a comfortable grip and a built-in LED light. This illumination is a game-changer, allowing you to clearly see where you’re working, ensuring you don’t miss any areas and can maintain the correct angle and pressure. The device gently removes peach fuzz and exfoliates the top layer of dead skin cells, revealing smoother, brighter skin underneath.
I found the Flawless Dermaplane Glow to be quite effective for its price point. The gentle sonic vibrations, combined with the precision blade, work together to provide a satisfactory exfoliation. The immediate after-effects are a softer skin texture and a more luminous complexion. It’s a good option for those who want to try dermaplaning without investing in a high-end device. The ease of use, particularly with the LED light, makes it a less intimidating choice for beginners. Following up with a hydrating serum and moisturizer after use amplified the glow effect, leaving my skin feeling refreshed and revitalized.
Verdict: A beginner-friendly dermaplaning tool with helpful features like an LED light for enhanced results. Finishing Touch Flawless Dermaplane Glow
Stackable Stainless Steel Dermaplaning Tool
For those who prefer a more traditional and perhaps sustainable approach to dermaplaning at home, the Stackable Stainless Steel Dermaplaning Tool is an excellent choice. This tool typically comes with multiple stainless steel blades that can be stacked or replaced, offering a cost-effective and eco-friendly option. Stainless steel is a durable and hygienic material, and the sharpness of these blades is generally very good, allowing for effective removal of peach fuzz and dead skin cells. The design is often simpler, focusing on the core function of dermaplaning.
I found that while this tool requires a bit more manual dexterity and precision than some of the more modern, ergonomically designed devices, it delivers excellent results when used correctly. The key is to maintain that consistent 45-degree angle and use light, feathery strokes. The stainless steel blades are sharp enough to provide a thorough exfoliation, leaving the skin feeling incredibly smooth and looking visibly brighter. It’s a tool that rewards a careful and practiced hand. For individuals looking for a no-frills, effective dermaplaning experience with a focus on reusable components, this type of tool is ideal.
Verdict: A durable and eco-friendly option for experienced users or those who prefer a more traditional dermaplaning tool. Stackable Stainless Steel Dermaplaning Tool
Juno Skin Dermaplaning Tool
The Juno Skin Dermaplaning Tool is a well-regarded option that strikes a good balance between effectiveness and user-friendliness, making it a solid choice for those interested in dermaplaning at home. It’s designed to be ergonomic, fitting comfortably in the hand, which is essential for control and precision during the treatment. The blade is crafted from high-quality stainless steel, ensuring a sharp edge that can effectively remove fine facial hairs and dead skin cells without causing undue irritation, provided it’s used correctly.
I observed that the Juno Skin tool offers a satisfying level of exfoliation. The immediate result is smoother, softer skin with a noticeable improvement in radiance. It effectively prepares the skin for better absorption of skincare products, making your serums and moisturizers work harder. This tool is a great option for those who are perhaps a little hesitant about at-home dermaplaning but want a reliable tool that delivers visible results. It’s how effective simple, well-designed tools can be for achieving professional-level skincare outcomes at home.
Verdict: A reliable and user-friendly dermaplaning tool that provides effective exfoliation for smoother, brighter skin. Juno Skin Dermaplaning Tool
How to Build a Dermaplaning Routine and Expert Tips
Integrating dermaplaning at home into your skincare routine can unlock significant benefits, but it’s about more than just the act itself. It’s about understanding frequency, preparation, and post-treatment care. Here are my top tips to help you build a safe and effective dermaplaning routine:
- Start Slowly and Observe Your Skin: If you’re new to dermaplaning, begin by doing it just once every 2-3 weeks. Pay close attention to how your skin reacts. Does it become red or irritated? Does it feel overly sensitive? Based on your skin’s response, you can gradually increase the frequency to once a week if your skin tolerates it well, but for most, every 2-4 weeks is sufficient for maintaining results. Over-exfoliation can damage your skin barrier.
- Never Dermaplane Over Active Breakouts or Irritated Skin: This is non-negotiable for safety. Active acne, rosacea flares, eczema patches, or even a recent sunburn are all contraindications for dermaplaning. The blade can spread bacteria, worsen inflammation, and cause further damage to already compromised skin. Wait until your skin is clear and calm before proceeding.
- Prep with a Gentle Cleanse and Ensure Dryness: Always start with a clean, dry face. Use a mild, pH-balanced cleanser to remove all traces of makeup, oil, and dirt. After rinsing, ensure your skin is completely dry before you begin. Performing dermaplaning on wet or damp skin significantly increases the risk of nicks and cuts.
- Follow Up with Hydration and Sun Protection: Immediately after dermaplaning, your skin is highly receptive to product absorption. Apply a hydrating serum (like one with hyaluronic acid) followed by a rich, soothing moisturizer. Crucially, wear broad-spectrum SPF 30 or higher every single day, especially the day after dermaplaning, as your skin will be more sensitive to the sun. Avoid harsh actives like retinoids or strong exfoliants for at least 24-48 hours.
- Clean Your Tool Meticulously: Hygiene is paramount. After each use, thoroughly clean your dermaplaning tool according to the manufacturer’s instructions. This usually involves rinsing the blade under warm water and then disinfecting it with rubbing alcohol. Store your tool in a clean, dry place to prevent contamination. A clean tool is essential for preventing infections and ensuring the blade remains effective.
Frequently Asked Questions About Dermaplaning at Home
Q: How often should I dermaplane my face at home? For most people, dermaplaning at home once every 2 to 4 weeks is sufficient. This allows your skin enough time to regenerate and prevents over-exfoliation, which can damage your skin barrier. Always listen to your skin; if it feels sensitive or irritated, extend the time between sessions.
Q: Will dermaplaning make my facial hair grow back thicker or darker? No, this is a common myth! Dermaplaning shaves the hair at the skin’s surface, much like shaving your legs. It doesn’t affect the hair follicle, so the hair will grow back at its natural rate, thickness, and color. It might feel slightly different as it grows back because the tip is blunt, but it won’t be coarser.
Q: Can I dermaplane if I’ve acne? It’s generally not recommended to dermaplane over active breakouts, as you risk spreading bacteria and worsening inflammation. If you have post-acne marks or clogged pores (but no active pustules), you might find gentle dermaplaning beneficial once your skin is calm. Always consult with a dermatologist if you have significant acne concerns.
Q: What should I do if I accidentally cut myself while dermaplaning? If you get a small nick, don’t panic. Gently rinse the area with cool water and apply a small amount of antibiotic ointment or a soothing balm. Avoid applying makeup to the area until it has healed. For deeper cuts, apply pressure and seek medical advice if necessary.
Q: How do I know if I’m using the correct angle and pressure? The ideal angle for dermaplaning is approximately 45 degrees to your skin. You should be using very light, feathery strokes, as if you’re lightly skimming the surface. The tool should glide smoothly without digging in. If you feel significant resistance or pain, you’re likely applying too much pressure.
Embracing dermaplaning at home can be a rewarding part of your skincare journey, offering immediate improvements in smoothness and radiance. By understanding the science behind exfoliation and carefully selecting the right tools, you can safely achieve that coveted glowing complexion. Remember that consistency, gentle technique, and proper aftercare are key to maximizing the benefits while minimizing any risks. My exploration of various tools and techniques aims to empower you to make informed decisions about your skin.
I encourage you to approach at-home dermaplaning with patience and a focus on your skin’s individual needs. Listen to what your skin is telling you, and don’t be afraid to adjust your routine accordingly. With the right approach, you can enjoy the satisfying results of smoother, brighter skin and a more effective skincare routine.
Discover top-rated dermaplaning tools on Amazon
Related Articles
- How to Build a Skincare Routine for Sensitive Skin
- Best Moisturizers for Dry Skin 2026: Rich Creams That Actually Hydrate
- Best Retinol Serums 2026: Top 5 Ranked by Strength and Results
- Peptides in Skincare: What They Do and Which Products Are Worth It for Mature Skin 2026
Where to Buy

💬 Join the Conversation
Have thoughts on this article? We'd love to hear from you.